How to connect to webex via computer
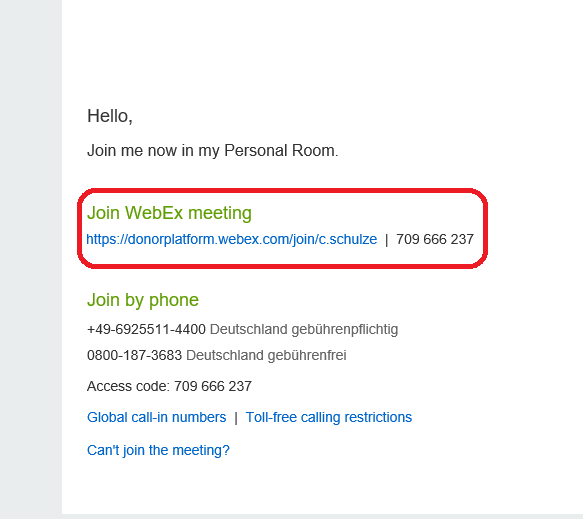
You will receive an invitation for the meeting, which will most probably look like on the figure below (Figure 1). But we might also just send you the link in an email with the official invitation. Before you click on the link, please make sure that your headset/microphone is connected to the computer and the volume of your audio device is up.
Once you click on the link, your internet broswer will open (InternetExplorer, Mozilla, Chrome, Edge or Safari). Keep in mind that this is a manual for connecting to the meeting while using the computer. If you use the internet connection of your smart phone, you might need to download an application.
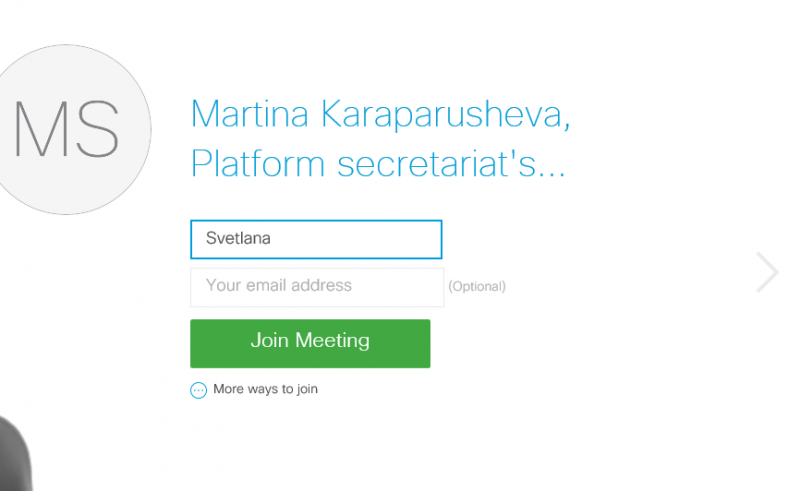
Once the browser is open, you will be asked to enter your name (Figure 2). We would very much appreciate, if you take the time to type in your name and email. This helps us a lot with preparing the minutes.
After you put in your name and email, click on join meeting.
Your browser will automatically open a page that looks like in this (Figure 3). Click on “Go here”.
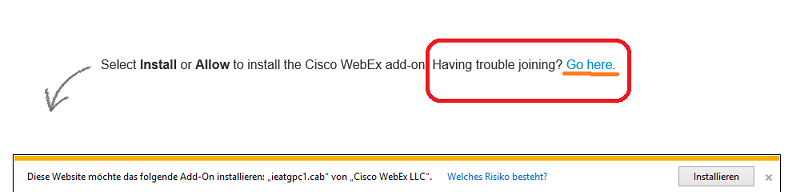
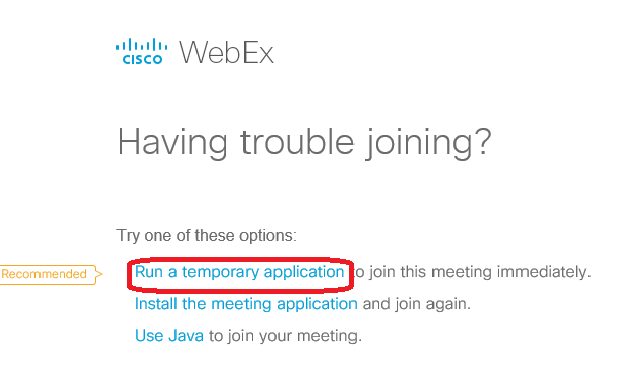
The page will change to this (Figure 4), where you need to click on “Run temporary application“.
A small message will appear at the bottom of your screen. Please click on “Run” (Figure 5). You are not installing any software at this moment, so this should not be a problem for any government issued computer.

Please Note
Your browser may also skip the step as in Figure 3 and go immediately to the possibility to “Run a temporary application”. If/ When you see this page, please click on “Go Here”.
The WebEx Application will then appear on your screen, asking you to “Select Audio Connection” and “Select Video Connection” (Figure 6).
Under “Select Audio Connection”, we recommend choosing the option “Call using computer”. This option ensures the best audio quality.
If you do not have a headset or a microphone, you can also choose on this stage the option “Call me in” from the same menu as “Call using my computer”. In the Menu under “Select Video Connection”, you can choose the option “No video”. We urge you to click on no video, as video makes the connection slower and we might experience connection issues.
Once you have selected the preferred connections and settings, please click on “Connect Audio and Video”.

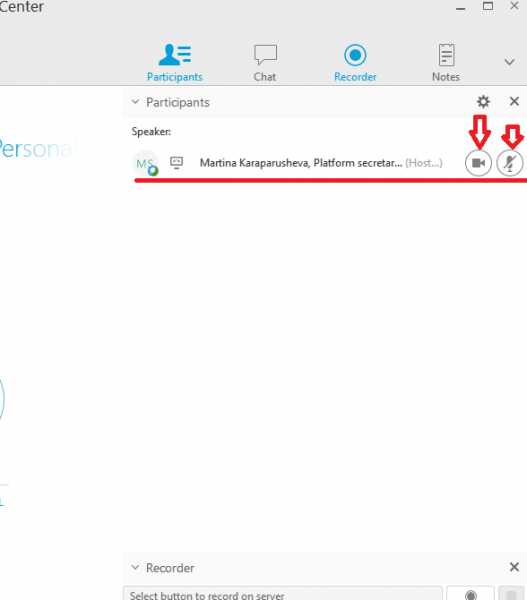
Once you are connected, on the right side of the screen you will see the list with all participants. Next to your name you will see two small icons – camera and microphone. If you wish to switch the camera on, you would need to click on the small icon.
Clicking on the microphone will mute you. You are not automatically muted, so when you click on the mic it will turn red and indicate that you are muted. If you wish to un-mute yourself, just click again on it.
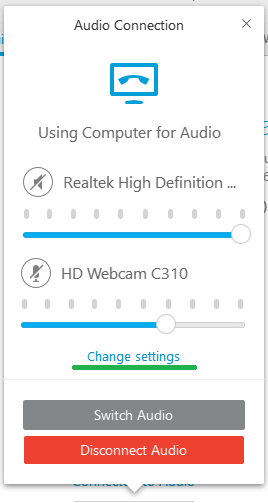
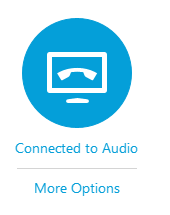
On the left-center side of the screen, you will have three bubbles. Important is the first one that says: “Connected to audio/More options”.
If you are experiencing troubles hearing the participants or we indicate troubles hearing you, you can click on “Connected to audio” and check your audio settings.
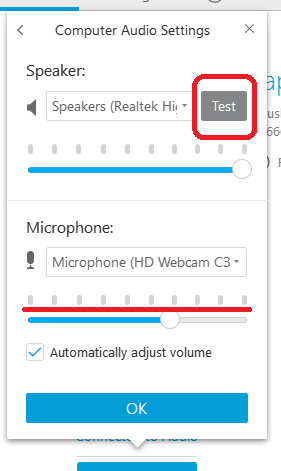
This small pop-up window will appear, showing you the speakers and microphone you are using. If you want test the audio, just click on “Change settings”. The window will change. Now you will have the opportunity to test your speaker. When you click on “Test” you should be able to hear music. If you don’t, please first check the volume on your computer and if the volume is up, try changing your speaker by using the drop-down menu.
To test the microphone, you will just need to say something and you will see the bar, underscored in red, turning green. If this does not happen, you can change the microphone by clicking on the name and choosing another one.
Once all settings are checked and functioning, please click on Ok to confirm.